Edit rendered images
Last updated: September 16, 2026
After generating a render, you can refine or adjust it in three ways: prompt-only edits, targeted selection edits, and image reference edits.
Accessing the edit tools
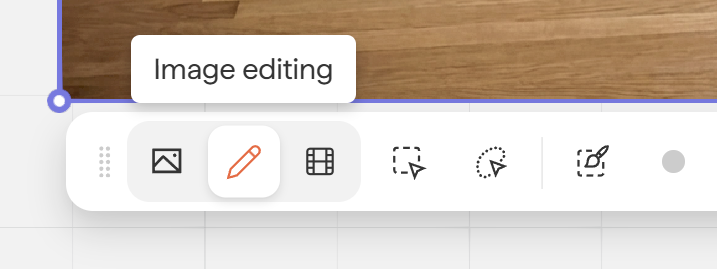
To enter edit mode:
Click on a rendered image on the board
Select the Edit option in the toolbar
Edit with prompt only
Prompt-only editing works best when you want to change something that affects the entire design uniformly — for example:
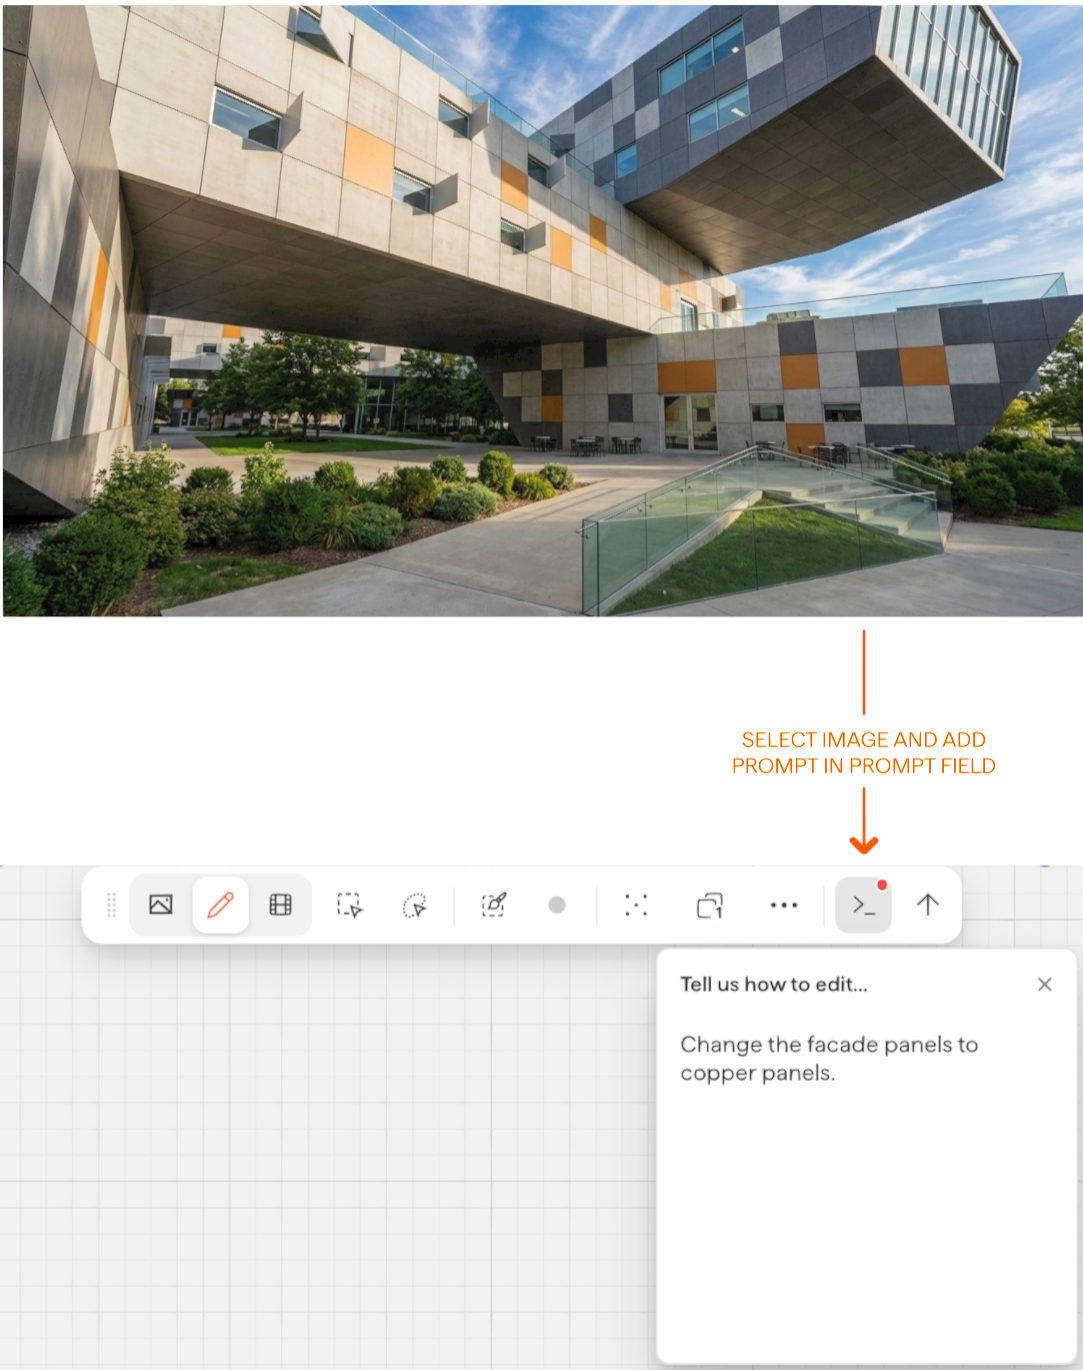
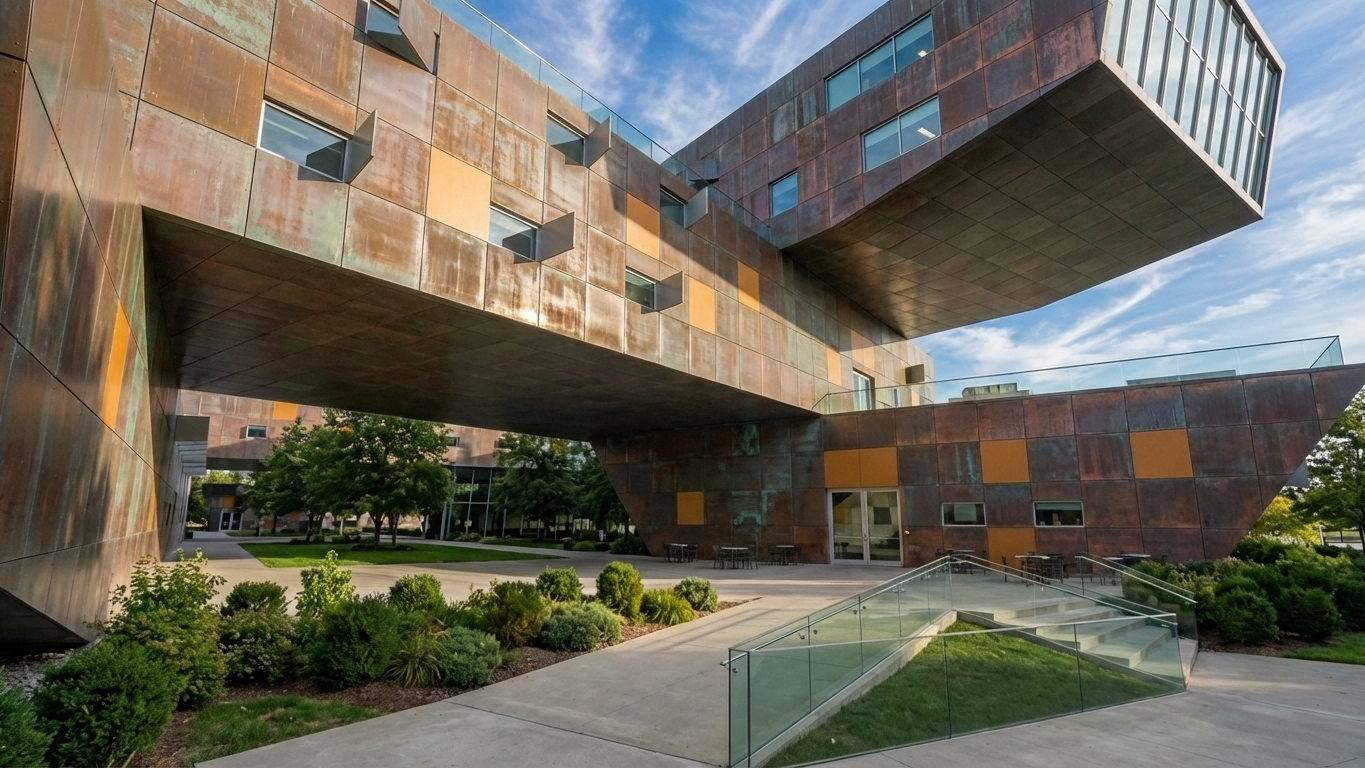
Change the entire facade to Corten steelChange all windows to square windowsMake the exterior timber cladding
This approach is most effective for broad, global changes.
Click on the rendered image and enter edit mode. Click the prompt button to start typing your prompt:
Result from the above example:
Edit with selection (lasso) and prompt
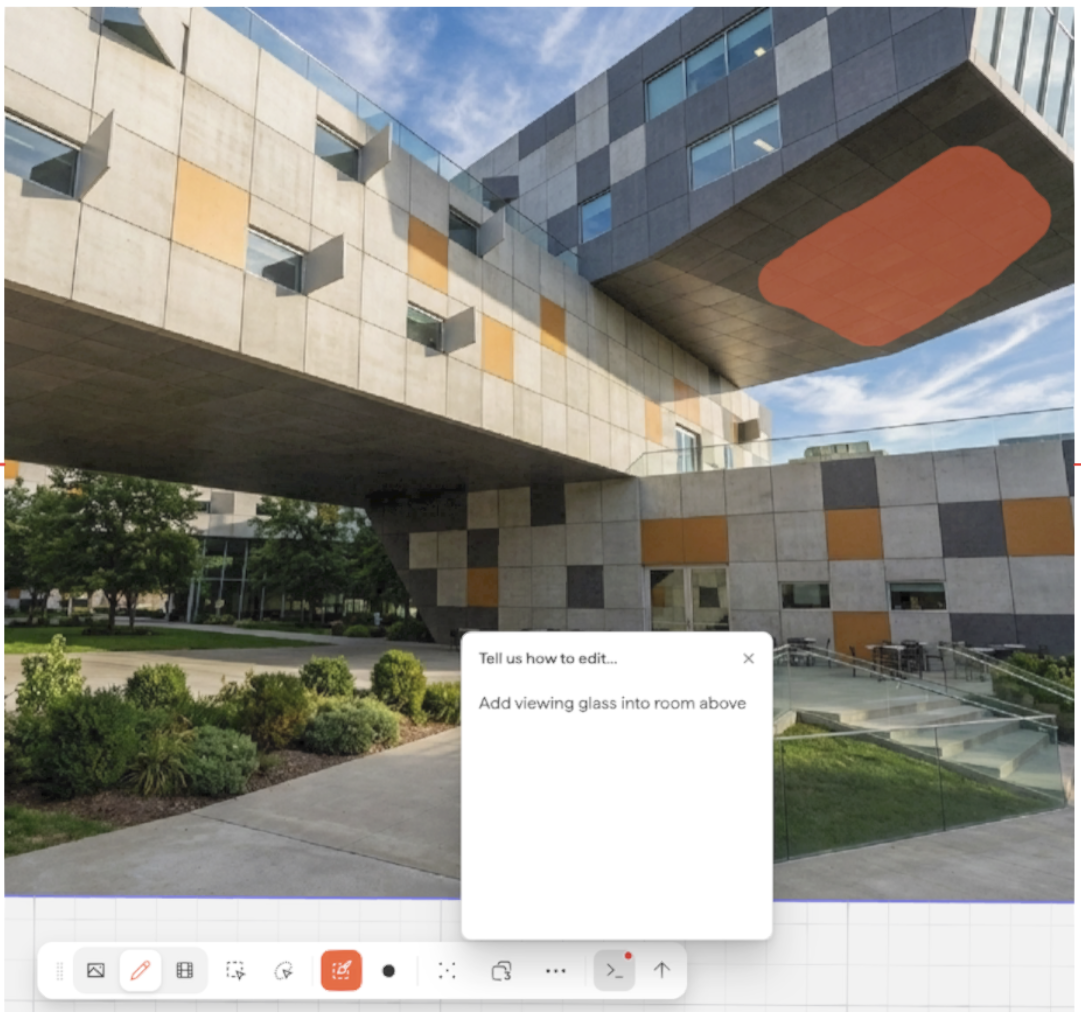
For targeted changes, use the Lasso tool to select a specific region of the image, then write a prompt describing the change you want in that region.
Start by selecting the image you want to modify, and select the Image Editing button.

Sketch the area you would like to edit, then type in the prompt what you would like to edit about the sketched area.
Result from the above example:
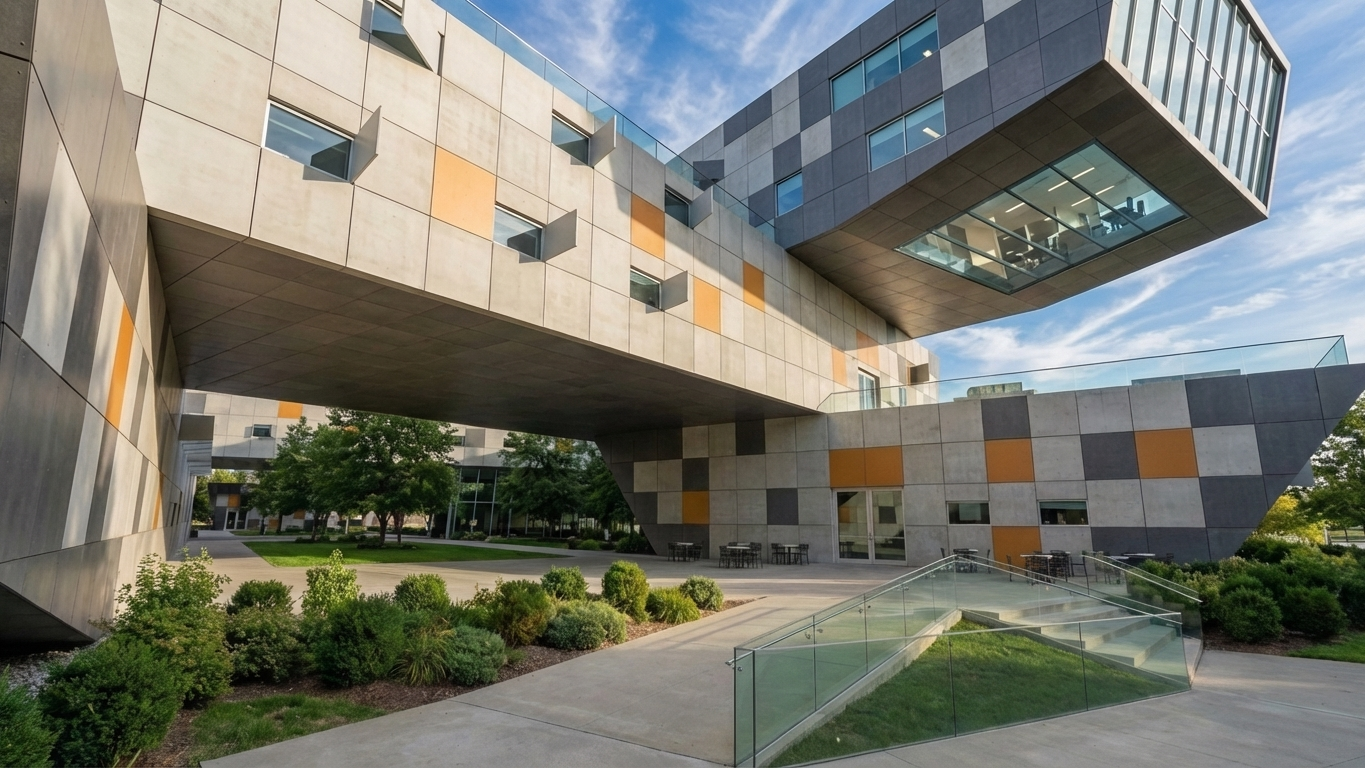
Image reference edits
Use up to 14 reference images to guide material, texture, lighting, or atmosphere changes — handy for trying a specific finish, fabric, or mood taken from another image. Select your reference image(s) together with the rendered image (up to 14 references), then write a prompt that refers to them by number — for example, Apply the texture from image2 to the wall on the right in image1. This works best on an already-rendered image rather than a raw model view.
For more details, see → 📄 Image Referencing
Next steps
Need help? Reach out to us at community.motif.io